Barrel Tile Roof Installation in Miami: The Complete Guide
What Actually Happens When You Install a Barrel Tile Roof in Miami
Most homeowners have no idea what happens during a barrel tile installation. They sign a contract, a crew shows up, and 14 days later there's a new roof. Somewhere in the middle, a tree falls, they get rain, and the contractor says something about "phase 3 being delayed." What even is phase 3?
I'm going to walk you through the exact installation process for a barrel tile roof in Miami-Dade, day by day, phase by phase, so you know what your contractor is doing, why it matters, and what can go wrong. I've been running barrel tile crews across Miami since 2004, and the installation is 60 percent of the story. The rest is product selection and HOA compliance. For the product and HOA side, read my barrel tile overview. This post is purely about what happens on your driveway when the crew arrives.
The 14-Day Installation Timeline (What Actually Happens)
A typical 2,200 square foot barrel tile installation in Miami takes 10 to 18 days. Here's the day-by-day breakdown on a standard hip roof with moderate complexity. I'm giving you a clay two-piece Mission installation because that's the most complex job we do. One-piece S-tile or concrete barrel is similar but 2 to 4 days faster.
Day 0: Pre-installation walk-through. A day or two before the crew arrives, I walk the property with the homeowner to mark landscaping to protect, identify the staging area for tile pallets and dumpster, confirm vehicle access, and talk through expectations. If you have specialty plants you want protected, mark them with flagging tape. If you have a pool, we'll tarp the pool deck to prevent tile fragments from falling in.
Day 1: Delivery and tear-off start. Tile pallets arrive on a delivery truck in the morning. Dumpster gets dropped in the driveway. The crew starts tearing off the existing roof in sections, starting at the back of the house so the dumpster fills from the back forward. On a standard home, we can get through 40 to 60 percent of the tear-off in one day. Expect loud noise from nail removal and tile demolition.
Day 2: Tear-off completion and deck inspection. Remaining tiles come off and we're down to bare decking. This is when we find out the condition of the deck. On older homes, we almost always find soft spots, water-damaged areas, or sections nailed with inadequate fasteners. I walk every square foot with a moisture meter and my foreman marks areas that need attention. Any deck that can't be re-nailed to HVHZ code has to be replaced.
Day 3: Deck repair and re-nail. Bad decking gets removed and replaced with new 5/8-inch plywood or OSB. The remaining deck gets re-nailed to the Miami-Dade HVHZ schedule: ring-shank nails at 6-inch spacing on edges and in the field. This is an inspection hold point. The deck inspector comes out to verify the re-nail before we continue.
Day 4: Underlayment installation. After the deck passes inspection, we install high-temperature self-adhered underlayment across the entire deck. I specify Polyglass Polystick TU-P Plus or Grace Ice & Water Shield HT, both of which carry Miami-Dade NOAs. This is your secondary water barrier. If a tile ever cracks or lifts during a storm, the underlayment is what keeps water out of the house. We seal every seam, roll every lap, and detail around every penetration.
Day 5: Drip edge, eave metal, underlayment inspection. Drip edge flashing goes in along all eaves, rake metal goes along the gable ends, and we install bird stops at the eave line to prevent animals from nesting under the tiles. The Miami-Dade inspector comes out again to sign off on the underlayment and edge metal before we start laying tile.
Days 6 through 8: Pan tile installation. This is where the two-piece Mission system shows its character. The pan tiles are the flat base tiles that carry water down the roof. We start at the eaves and work up, laying each course of pans in a straight line, bonding them to the underlayment with closed-cell polyurethane foam adhesive (Polyset AH-160 or equivalent). On a 2,200 square foot home, we can complete the pan layer in 3 to 4 days.
Days 9 through 11: Cap tile installation. The cap tiles are the curved covers that sit over the joints between pans. Each cap gets foam-adhered and, on wind-exposed positions (eaves, rakes, ridges), mechanically clipped. This is the phase where the barrel tile profile comes alive. Before day 9, the roof looks like a grid of flat tiles. By day 11, it looks like a traditional Spanish Colonial roof. Most homeowners spend a lot of time taking photos around this phase.
Day 12: Ridge and hip tile installation. The peaks of the roof (ridges) and the hip lines where slopes meet get special tapered cap tiles. These are the most wind-exposed tiles on the roof and they get the most attention. We mortar and mechanically clip every ridge and hip tile. On historic restoration work in Coral Gables, we may use traditional mortar bedding throughout the ridge line because the original aesthetic matters.
Day 13: Flashing and penetrations. Every chimney, skylight, plumbing vent, bathroom fan, and HVAC penetration gets custom-fabricated metal flashing. Counterflashing at chimneys gets cut into the masonry or installed with sealant and termination bars. This is the phase that separates good tile roofers from bad ones. Sloppy flashing work is where 80 percent of tile roof leaks start.
Day 14: Final cleanup and inspection. Crew pulls the magnet sweeper across the yard and driveway to collect any stray metal debris. We do a final walk-through with the homeowner. Miami-Dade final inspector signs off on the completed roof. Permit closes out. Dumpster gets hauled away.
If your home has a steeper pitch, a second story, cut-up hip-and-valley geometry, or HOA requirements for specialty tiles, expect 2 to 4 extra days. Coral Gables and Gables Estates jobs often run 18 to 25 days total because of historic tile matching and architectural review requirements.
The Structural Assessment That Has to Happen First
Every barrel tile installation in Miami starts with a structural assessment before any work begins. Not because I'm being cautious, but because barrel tile is heavy enough to damage an undersized roof structure.
A two-piece Mission clay tile roof on a 2,200 square foot home adds about 22,000 to 26,000 pounds of dead load. Concrete barrel adds 24,000 to 30,000 pounds. That's 11 to 15 tons sitting on your trusses.
If your home was originally built for barrel tile (almost every home in Coral Gables, Gables Estates, Pinecrest, Cocoplum, and older Coconut Grove), the trusses were engineered for the load. The structural engineer will clear your existing framing in 30 minutes and we move on.
If your home was built for asphalt shingles (most homes in Kendall, Homestead, Doral, Miami Lakes, Hialeah, and newer suburbs), the trusses were rated for 4,000 to 7,000 pounds of roof load. A barrel tile system is 3 to 5 times that. Without reinforcement, the trusses will sag, the ceiling drywall will crack, and within 3 to 5 years you'll have a structural problem that costs $15,000 to $30,000 to fix.
I require a licensed Florida structural engineer on every tile conversion. Cost runs $450 to $900. The engineer either clears your existing structure or writes a reinforcement plan. Common reinforcement costs:
- Truss sistering (12 to 20 trusses needed): $2,000 to $6,000
- Collar ties and intermediate bracing: $1,800 to $4,500
- Load-bearing wall support below long spans: $3,000 to $7,000
- Complete truss replacement: $10,000 to $20,000 (rare)
Add 2 to 5 days to the installation timeline if reinforcement is needed.
What Can Go Wrong During Installation
Barrel tile installations have specific failure modes that show up years later if the crew cuts corners. Here's what I watch for on every job and what you should look for on yours:
Tile chatter. If tiles aren't bonded tightly to the underlayment or to adjacent tiles, wind can cause them to vibrate and loosen over time. Fix: proper foam adhesive coverage (full contact on the tile underside, not just spots), mechanical clips in high-wind zones, correct tile spacing.
Broken ridge tiles after first storm. Ridge tiles are the most wind-exposed tiles on the roof. If they're not properly clipped and mortared, they'll lift in the first 50 mph wind event. Fix: mechanical clips on every ridge tile, high-quality mortar bed, and in some cases a termination bar with sealant.
Leaks at penetrations within 6 months. Sloppy flashing work causes most tile roof leaks. Fix: custom-fabricated metal flashing with proper overlap (minimum 4 inches on step flashing, 6 inches on counterflashing), sealed with compatible polyurethane sealant, and detailed per manufacturer specifications for the tile profile.
Underlayment failure at year 3 to 5. If cheap underlayment is used, it degrades under the tiles and starts leaking long before the tile itself fails. Fix: only use Miami-Dade NOA-listed self-adhered products (Polyglass, Grace, or GAF StormGuard). Budget synthetic underlayments without self-adhesive backing don't hold up in Miami heat.
Color mismatches on custom-ordered clay. Historic and custom clay tiles can vary in color between batches. Fix: order all tiles for the project from the same production run, and mix pallets during installation to distribute any color variation evenly across the roof so no single batch ends up concentrated in one visible area.
Structural sag after first hurricane season. If structural reinforcement was skipped on a conversion from shingles, the trusses start to deflect within 12 to 18 months. Fix: don't skip the engineer. Ever.
If you notice any of these issues on your roof within 2 years of installation, call your contractor and invoke the workmanship warranty. If they don't respond, file a complaint with the Florida DBPR.
What a Real Installation Costs in 2026
These are actual numbers I'm quoting on barrel tile installations across Miami-Dade this year. They include tear-off, deck re-nail to HVHZ code, self-adhered underlayment, foam adhesive and mechanical fastening, all tiles, ridge and hip detailing, flashing, permit, and inspection.
| Home Size | Concrete Barrel (One-Piece) | Clay Barrel (One-Piece) | Clay Two-Piece Mission |
|---|---|---|---|
| 1,500 sq ft | $20,000 - $27,000 | $24,000 - $33,000 | $30,000 - $42,000 |
| 2,000 sq ft | $26,000 - $36,000 | $32,000 - $44,000 | $40,000 - $56,000 |
| 2,500 sq ft | $32,500 - $45,000 | $40,000 - $55,000 | $50,000 - $70,000 |
| 3,000 sq ft | $39,000 - $54,000 | $48,000 - $66,000 | $60,000 - $84,000 |
| 4,000 sq ft | $52,000 - $72,000 | $64,000 - $88,000 | $80,000 - $112,000 |
Add 15 to 30 percent for Coral Gables historic district, Gables Estates, Cocoplum, and Cocoplum for HOA compliance, historic tile matching, and complex architectural review requirements. Add 20 to 35 percent for three-story homes, steep pitches over 8:12, or heavily cut-up roof geometry with lots of valleys and dormers.
Structural reinforcement, if needed, is a separate line item ($3,000 to $15,000 depending on scope). Custom historic tile matching can add $5,000 to $20,000 depending on the profile and quantity needed.
Wind Performance in Real Miami Hurricanes
I've inspected dozens of barrel tile roofs after Hurricane Irma (2017), Michael (2018), and Ian (2022). Here's what I've consistently seen:
Properly-installed barrel tile roofs with Miami-Dade NOA products, foam adhesive bonding, mechanical clips at ridges and perimeter, and code-compliant underlayment came through Cat 4 winds with minimal damage. Typical post-storm loss on a well-installed roof is 2 to 5 percent of tiles, usually at exposed ridge and hip locations. The underlayment stays intact, the home stays dry, and repairs cost $2,000 to $5,000.
Poorly-installed barrel tile roofs (mortar beds without mechanical attachment, cheap underlayment, inadequate ridge detailing) lost 30 to 60 percent of tiles in the same storms. Water intruded through the damaged underlayment, ceilings collapsed, and full replacements ran $45,000 to $90,000.
The difference isn't the product. It's the installation. A 150 mph-rated Miami-Dade NOA tile installed poorly will fail at 90 mph. The same tile installed correctly will outlast the house. That's why contractor vetting matters so much on barrel tile work.
How to Tell If Your Installation Is Being Done Right
You don't need to be a roofer to spot bad work. Here are five things to check during your installation:
- Watch the deck re-nail. On day 3, walk outside and look at the roof. You should see the foreman or crew chief walking the deck with a nail gun, driving ring-shank nails at short intervals (6 inches). If you see random nailing or large gaps, that's a red flag.
- Check the underlayment coverage. On day 4 after underlayment is installed, the roof should look completely covered in a black or green rubber-like membrane with overlapping seams. No gaps, no exposed plywood, no loose edges. If you see bare deck in any area, something's wrong.
- Look at the foam coverage on lifted tiles. If you can safely see the underside of any tile during installation (don't climb the roof, but ask the crew to show you), the foam adhesive should cover the full contact surface, not just a few dots. Partial coverage means wind can lift the tile.
- Inspect the ridge tiles after installation. The ridge tiles along the peak should be tightly set with no visible gaps or loose tiles. Each one should feel solid if you gently press on it (have the crew do this, not you). Mortar joints should be clean and smooth.
- Verify permit and inspections. Every installation in Miami-Dade needs at least two inspections: the underlayment inspection and the final inspection. Ask to see the permit before work starts and the approved inspection cards after. If your contractor can't show you these, walk away.
Why the Wrong Contractor Costs You Twice
I get 20 to 30 calls a year from homeowners who paid someone else $35,000 to $75,000 for a barrel tile installation that's failing within 3 to 7 years. The fixes are almost always more expensive than doing the original job correctly.
Common post-failure scenarios I see:
- Mortar bed installations that lost tiles in the first 60 mph storm. Fix: full tear-off and re-install with modern foam adhesive and mechanical attachment. Cost: $30,000 to $70,000.
- Cheap underlayment that degraded under the tiles and started leaking. Fix: lift all tiles, strip old underlayment, install Miami-Dade NOA self-adhered underlayment, reinstall tiles (expect 15 percent loss). Cost: $15,000 to $35,000.
- No structural engineering on a shingle-to-tile conversion. Fix: structural remediation with truss sistering and load redistribution. Cost: $10,000 to $25,000 plus potential interior repairs for drywall cracking.
- Sloppy flashing work causing chronic leaks at chimneys and skylights. Fix: strip tiles around each penetration, replace all flashing, reseal, and reinstall tiles. Cost: $1,500 to $4,500 per penetration.
- Wrong tile profile for historic restoration getting rejected by the Board of Architects in Coral Gables. Fix: tear off and replace with approved profile. Cost: full replacement.
The math is brutal. A $42,000 job done by the wrong contractor becomes $62,000 to $90,000 by the time you pay for the original work, the failure damage, and the second contractor to fix it right. Spend the extra money upfront on a specialist and you'll save 30 to 50 percent long term.
How to Vet a Barrel Tile Installer in Miami
Ask every contractor you interview these questions:
- How many barrel tile installations have you completed in Miami-Dade in the last 2 years? Look for 15+. Under 10 means they're still learning on your roof.
- What specific tile product are you quoting and what's its Miami-Dade NOA number? Every bid should have a specific product code.
- Do you use foam adhesive, mechanical fasteners, or both? The correct answer for most Miami installations is both.
- Are you a certified installer for the tile manufacturer? Eagle, Boral, Entegra, Ludowici, MCA, and Redland all have certification programs.
- What's your process for structural engineering on tile conversions? If they skip the engineer, walk away.
- Can I see 3 installations you completed in Coral Gables, Pinecrest, or Gables Estates in the last year? If you're in one of those neighborhoods, local references matter.
- What underlayment product and NOA are you specifying? Should be Polyglass Polystick TU-P Plus, Grace HT, or equivalent Miami-Dade NOA product.
Verify the Florida Certified Roofing Contractor license (starts with CCC) at myfloridalicense.com, check workers comp and general liability insurance, look up complaint history at the DBPR and BBB.
Ready for a Real Installation Quote?
Call us at 305-225-1535 or request a free estimate. We'll walk the roof, pull structural engineering if you're converting from shingles, confirm HOA requirements for your specific neighborhood, and give you a day-by-day installation timeline with itemized line-item pricing. No mortar beds, no cheap underlayment, no skipped structural work, no surprises.
Frequently Asked Questions
How much does a barrel tile roof cost in Miami?
Barrel tile roof costs range from $9 to $22 per square foot installed, depending on material (clay vs. concrete), roof complexity, and structural requirements. A typical 2,000-square-foot roof costs $18,000 to $44,000. Clay tiles cost 30-50% more than concrete but last longer. Despite higher upfront costs, barrel tile roofs can be more cost-effective over their 70-100 year lifespan.
What is the difference between barrel tile and Spanish tile?
Barrel tile (mission tile) uses separate pan and cap tiles to create a pronounced half-cylinder profile, while Spanish S-tile has an integrated wave pattern in a single piece. Barrel tile is more dramatic visually, slightly heavier, and takes longer to install. Both offer excellent hurricane resistance and longevity, but barrel tile is considered more prestigious.
Can barrel tile roofs withstand Category 5 hurricanes?
Yes. When installed to current Miami-Dade County standards with foam adhesive and hurricane clips, barrel tile roofs can withstand sustained winds of 150-175 mph (Category 5 hurricanes). The double-layer system provides redundancy. even if cap tiles are displaced, pan tiles and sealed underlayment prevent water intrusion. Barrel tiles also carry Miami-Dade NOA certification.
How long does barrel tile roof installation take?
Barrel tile roof installation typically takes 10 to 21 days, depending on roof size, complexity, and weather. This includes tearoff of existing roofing, structural reinforcement (if needed), deck preparation, underlayment installation, batten and flashing work, pan tile installation, cap tile installation, and final inspection. Complex roofs with multiple valleys and turrets may take longer.
Do barrel tile roofs require special maintenance?
Barrel tile roofs require minimal maintenance: annual inspections to check for cracked tiles and deteriorated mortar, periodic low-pressure cleaning (every 3-5 years), gutter cleaning, and tree trimming. Never walk on tile roofs without proper equipment. Individual tiles can be replaced as needed without disturbing surrounding tiles. Proper maintenance can extend the roof's lifespan beyond 75 years.
Need Roofing Help?
Whether you need an inspection, repair, or full replacement, our team of licensed roofing professionals is ready to help. Serving South Florida since 2004.
Related Articles

Complete guide to tile roof repair in Miami covering common damage types, repair costs, when to repair vs. replace, and how to find qualified contractors for Spanish, barrel, and flat concrete tile roofs.
Read More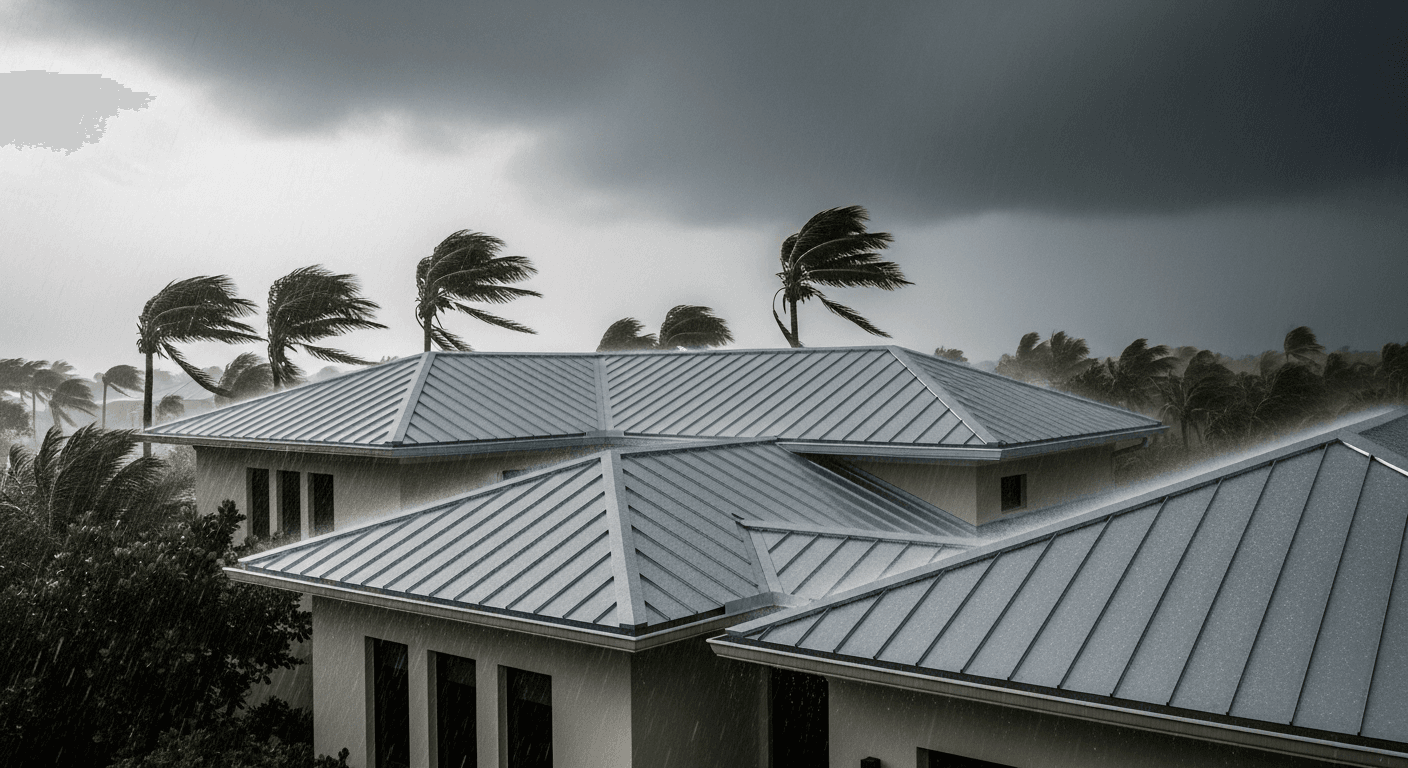
Compare hurricane resistant roofing options for Miami homes including standing seam metal, concrete tile, and impact shingles. Real wind ratings, costs, and installation requirements for the HVHZ.
Read More