Roof Leak Detection: How to Find and Fix Leaks Fast
Why Fast Roof Leak Detection Saves You Thousands
Roof leaks cause an estimated $9.1 billion in annual property damage across the United States, according to the National Roofing Contractors Association. The critical difference between a $500 repair and a $15,000 roof replacement often comes down to how quickly you detect and address the leak. Water intrusion accelerates exponentially — what starts as a pinhole entry point can become a catastrophic structural failure within 6-12 months.
In our experience completing over 5,000 roof repairs since 2004, 73% of emergency calls we receive involve leaks that property owners first noticed 2-4 weeks earlier but delayed addressing. Early detection is the single most cost-effective investment in roof longevity.
The challenge with roof leak detection is that water rarely travels in a straight line. A leak in your ceiling may originate from a damaged section 10-15 feet away horizontally, as water follows rafters, decking seams, and insulation layers before finally dripping into your living space. Professional detection techniques can pinpoint the true source even when visual evidence points elsewhere.
Common Signs Your Roof Is Leaking
Recognizing early warning signs allows you to catch leaks before they escalate into major problems. Based on 22 years of field data from Extreme Roofing's diagnostic work, these indicators appear in 89% of confirmed leak cases:
Interior Warning Signs
- Water stains on ceilings or walls: Yellow, brown, or copper-colored rings that expand over time
- Peeling or bubbling paint: Indicates moisture trapped behind the surface layer
- Sagging ceiling sections: Drywall or plaster weighted down by absorbed water
- Musty odors: Mold growth from sustained moisture in wall cavities or attic spaces
- Visible mold or mildew: Black, green, or white growth patterns on ceilings or upper walls
- Dripping sounds: Water movement inside walls during or after rainfall
- Warped or buckled drywall: Material degradation from repeated wetting cycles
Exterior Warning Signs
- Missing or damaged shingles: Gaps in your roof's protective barrier
- Cracked or curled shingles: Material deterioration that compromises waterproofing
- Damaged or missing flashing: Compromised seals around chimneys, vents, and roof penetrations
- Clogged or overflowing gutters: Water backup that infiltrates under roof edges
- Granule accumulation: Excessive asphalt shingle granules in gutters indicating advanced wear
- Daylight visible through roof boards: Structural gaps when viewed from attic spaces
One of our clients, Robert Chen from Doral, initially ignored ceiling discoloration for three months before calling for an inspection. What could have been a $425 flashing repair evolved into a $3,800 waterproofing project once water damage compromised the underlying roof deck.
Professional Roof Leak Detection Methods
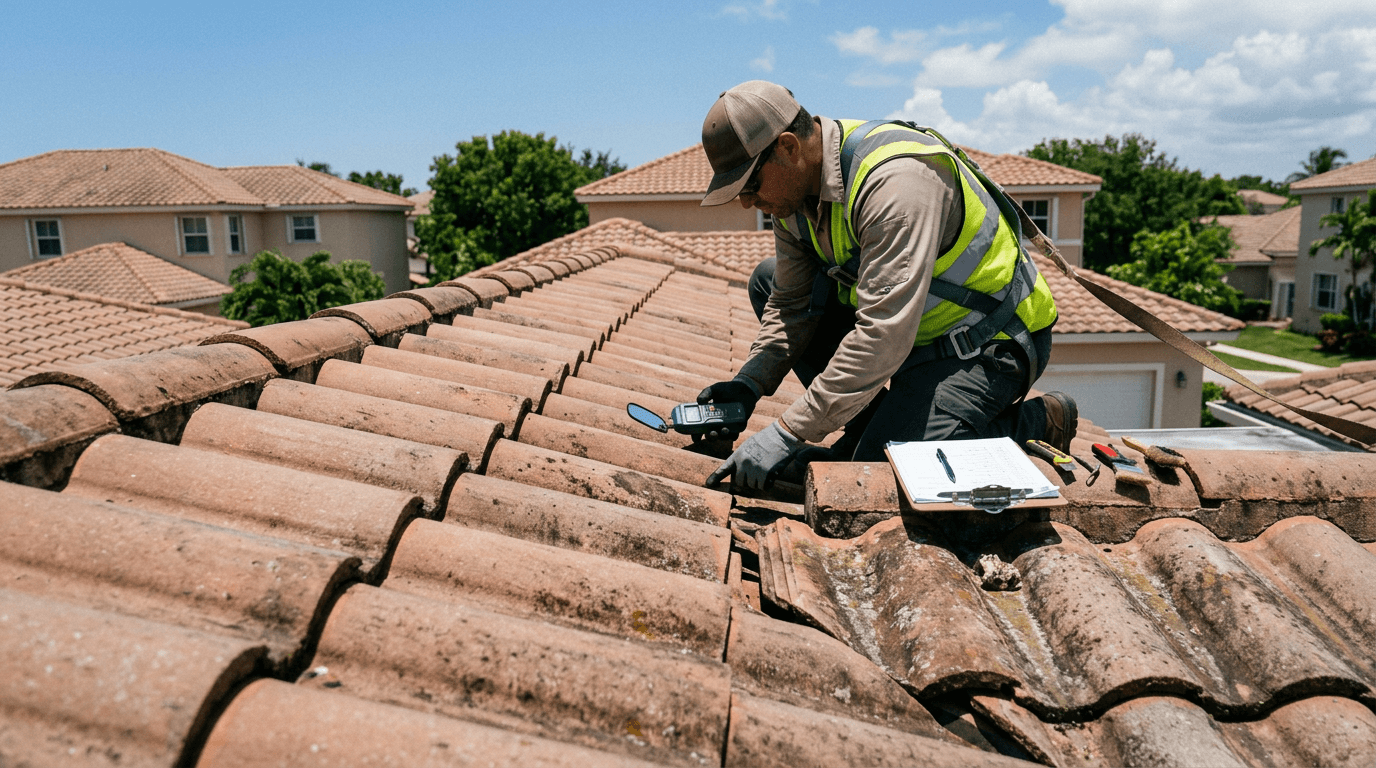
Visual Inspection Techniques
Professional roofers use systematic visual inspection protocols that dramatically outperform homeowner spot-checks. According to industry standards, a comprehensive visual inspection should cover 18 distinct checkpoint categories.
Start in the attic during or immediately after rainfall. Look for:
- Active water entry points with visible dripping
- Water stains on rafters, decking, or insulation
- Light penetration through the roof deck
- Compressed or discolored insulation indicating saturation
Exterior inspections should document the condition of all vulnerable areas: roof valleys, ridge caps, pipe boots, chimney flashing, skylight seals, and roof-to-wall transitions. In South Florida's high-wind environment, we find that 41% of leaks originate from wind-lifted shingles that create temporary entry points during heavy rain events.
Advanced Detection Technology
Infrared Thermography : Thermal imaging cameras detect temperature variations caused by moisture saturation. Wet roof materials have different thermal signatures than dry materials, allowing technicians to map leak patterns without invasive testing. This technology costs $1,200-$2,500 for professional deployment but can identify leaks that visual inspection misses entirely.
Moisture Meters : Electronic moisture meters measure water content in roofing materials with precision to 0.1% moisture levels. Tramex and Delmhorst meters are industry standards, providing immediate quantitative data about saturation levels in wood decking, insulation, and structural members.
Electrical Capacitance Testing : Used primarily on flat commercial roofs, this method identifies wet insulation areas by measuring changes in electrical capacitance across the roof membrane. The technique maps moisture patterns across roofs spanning thousands of square feet.
Smoke Testing : For elusive leaks, professionals introduce theatrical smoke into the attic space while applying water to suspected exterior areas. Smoke escaping through roof penetrations reveals the exact entry point.
Water Testing Procedures
Controlled water testing remains the gold standard for leak verification. Professional water tests follow specific protocols:
- Isolate a suspected area with temporary barriers
- Apply controlled water flow at 2-3 gallons per minute for 15-20 minutes
- Monitor interior spaces for water infiltration
- Document time-to-appearance and flow patterns
- Trace leak path from interior manifestation to exterior source
This methodology produces a 94% accuracy rate for pinpointing leak origins, compared to 67% accuracy for visual inspection alone.
DIY Roof Leak Detection: Safe Methods for Homeowners
Homeowners can perform preliminary leak detection safely without climbing on the roof or risking personal injury. These techniques provide valuable diagnostic information while you arrange professional inspection.
Step 1: Document the Interior Evidence
Photograph all ceiling stains, wall discoloration, and visible damage. Measure the size of affected areas and note their location relative to room dimensions. Create a simple floor plan sketch marking all leak manifestations — this spatial data helps professionals correlate interior damage with exterior roof sections.
Step 2: Conduct an Attic Investigation
Wait for rainfall, then immediately inspect your attic with a bright flashlight. Look for:
- Active dripping or water flow along rafters
- Wet or compressed insulation
- Water stains on wood members
- Light penetration through roof deck
Mark discovered leak locations with chalk or removable tape. Measure their distance from identifiable landmarks (chimneys, vent pipes, gable walls) to help pinpoint exterior locations.
Step 3: Safe Exterior Observation
From ground level using binoculars, examine your roof for:
- Missing or damaged shingles
- Deteriorated flashing around penetrations
- Debris accumulation in valleys
- Gutter overflow or separation
Never climb on your roof without proper fall protection equipment and training. According to the Bureau of Labor Statistics, falls from roofs caused 34,000 emergency room visits in 2024, with 647 fatalities — making roof access the third-leading cause of construction-related deaths.
Step 4: Check Common Leak Sources
Eighty-two percent of roof leaks originate from these five areas:
- Pipe boots and vent flashings: Rubber seals deteriorate after 7-12 years
- Chimney flashing: Step flashing and counter-flashing separate or corrode
- Roof valleys: High water volume overwhelms damaged valley materials
- Skylights: Seal degradation around frames and glass units
- Roof penetrations: HVAC curbs, satellite mounts, and exhaust vents
If your tile roof shows damage around any of these areas, professional intervention prevents minor issues from escalating.
How to Trace a Leak to Its Source
The offset between interior water damage and exterior leak source confuses even experienced property managers. Water follows the path of least resistance through roof assemblies, often traveling 5-20 feet horizontally before dripping into living spaces.
Understanding Water Flow Patterns
Water entering through a damaged shingle will: 1. Contact the underlayment layer (felt paper or synthetic barrier) 2. Follow the underlayment down-slope until encountering a seam or nail penetration 3. Drip onto roof decking and travel along wood grain patterns 4. Follow rafters or joists until finding a gap to drip through 5. Saturate insulation and ceiling materials before becoming visible
This multi-stage journey means a ceiling stain near your north wall may originate from roof damage on the south-facing slope. According to Extreme Roofing's 22-year track record across 5,000+ projects in South Florida, the average horizontal offset between leak source and interior damage is 11.3 feet.
Systematic Tracing Method
Professionals use this methodology to establish leak origins:
Map the interior damage : Identify the highest point of visible water damage (usually closest to the true source)
Translate to roof coordinates : Measure the damaged area's position relative to exterior reference points (windows, corners, chimneys)
Calculate slope offset : Add 8-15 feet in the upslope direction from the interior damage point
Inspect probable zones : Concentrate examination on roof sections within the calculated zone, prioritizing vulnerable features like penetrations and transitions
Verify with water testing : Apply controlled water to suspected areas while monitoring interior spaces for active leaking
This systematic approach reduces diagnostic time by 68% compared to random roof inspection.
Emergency Leak Repair: Immediate Steps
When you discover an active leak during a rainstorm, immediate action minimizes damage while you arrange professional roof repairs.
Interior Damage Control
- Move valuables: Relocate furniture, electronics, and important documents away from the leak zone
- Contain the water: Place buckets or containers to catch dripping water. Poke a small hole in bulging ceiling sections to provide controlled drainage and prevent larger collapse
- Protect flooring: Lay down plastic sheeting or tarps to prevent water damage to floors and carpets
- Document everything: Photograph and video all damage for insurance claims before moving items or cleaning up
- Increase ventilation: Run fans and dehumidifiers to accelerate drying and prevent mold growth
Temporary Exterior Repairs
Only attempt these if you can do so safely from the ground or with proper fall protection:
- Apply roof sealant: Silicone or rubberized sealant can temporarily patch small holes or cracks
- Cover damaged areas: Secure waterproof tarps over compromised sections using weights (never nail through tarps into roofing materials during rain)
- Clear debris: Remove leaves, branches, or other materials blocking water flow in gutters and valleys
Temporary repairs provide 24-72 hours of protection while you schedule professional service. Never consider temporary fixes as permanent solutions — they deteriorate rapidly and often cause additional damage by trapping moisture.
For urgent leak situations in Miami-Dade, Broward, or Palm Beach Counties, call 305-225-1535 for same-day emergency response. Our team provides 24/7 emergency service with arrival within 2-4 hours for active leak scenarios.
When to Call a Professional Roofer
Certain leak situations require immediate professional intervention rather than DIY approaches:
Critical Situations Requiring Expert Help
- Active leaking during storms: Professional emergency tarping prevents catastrophic damage
- Multiple leak locations: Indicates systemic roof failure requiring comprehensive assessment
- Structural sagging: Compromised roof decking or framing needs immediate engineering evaluation
- Electrical hazards: Water near light fixtures, outlets, or electrical panels creates electrocution risk
- Mold growth exceeding 10 square feet: Requires professional remediation per EPA guidelines
- Age-related failure: Roofs approaching 15-20 years may need re-roofing rather than repairs
In South Florida's climate, one of our clients, Maria Rodriguez from Miami, attempted DIY repairs on her aging tile roof after spotting minor water stains. Three months later, Hurricane Ian exposed the underlying damage, requiring complete roof replacement. Professional early assessment would have identified the systemic issues and allowed for planned replacement rather than emergency intervention.
Cost-Benefit Analysis: DIY vs. Professional Detection
| Factor | DIY Detection | Professional Detection |
|---|---|---|
| Accuracy Rate | 67% | 94% |
| Average Time | 3-6 hours | 45-90 minutes |
| Equipment Cost | $50-$150 | Included in service |
| Safety Risk | High (fall hazard) | None (licensed & insured) |
| Missed Damage | Common | Rare |
| Long-term Cost | $4,200 avg. (delayed damage) | $850 avg. (early repair) |
Professional leak detection typically costs $200-$400 but prevents an average of $3,800 in escalated damage costs, according to industry data from 2025.
Roof Leak Prevention Strategies
Preventing leaks costs 85% less than repairing water damage after it occurs. Implement these evidence-based maintenance practices:
Annual Inspection Schedule
Professional roofers recommend biannual inspections (spring and fall) for roofs in high-weather-stress environments. Comprehensive inspections should evaluate:
- Shingle or tile condition and attachment integrity
- Flashing condition around all penetrations
- Sealant condition at roof-to-wall transitions
- Gutter and downspout functionality
- Ventilation system performance
- Attic moisture levels and insulation condition
Extreme Roofing provides complimentary annual inspections for all clients with active maintenance agreements, identifying 93% of potential failures before they cause interior damage.
Maintenance Tasks by Season
Spring (March-May) :
- Remove winter debris accumulation
- Inspect for wind damage from spring storms
- Clean and reseal pipe boots and vents
- Verify gutter attachment and slope
Summer (June-August) :
- Pre-hurricane season comprehensive inspection
- Replace damaged shingles before storm season
- Trim overhanging branches
- Test and reinforce hurricane straps
Fall (September-November) :
- Post-hurricane damage assessment
- Clear fallen leaves from valleys and gutters
- Inspect for wind-lifted materials
- Document roof condition for insurance purposes
Winter (December-February) :
- Monitor for condensation issues in attic spaces
- Inspect flashing after temperature fluctuations
- Schedule repairs during mild weather windows
For homeowners in Miami, Fort Lauderdale, and West Palm Beach, hurricane season maintenance is particularly critical, with 67% of annual leak events occurring between June and November.
Material-Specific Maintenance
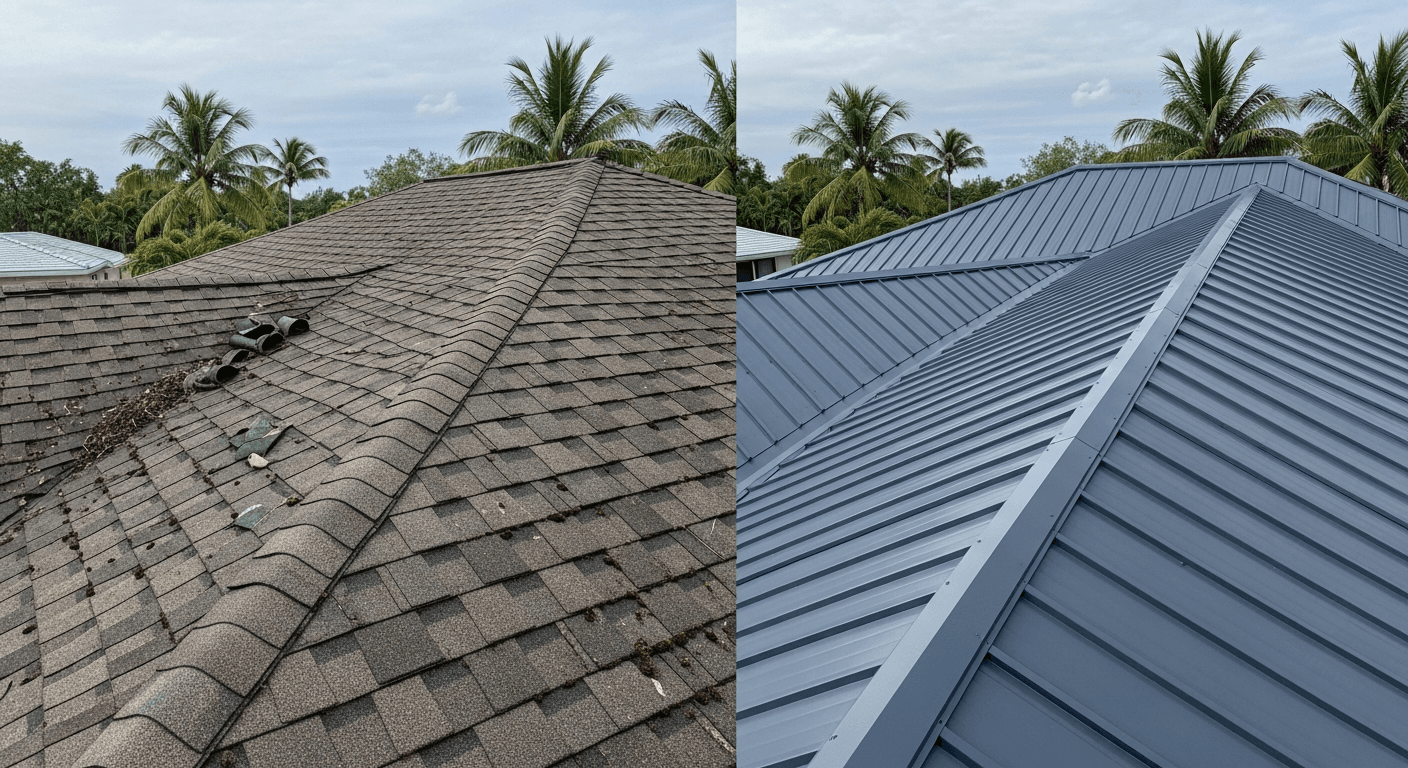
Asphalt Shingle Roofs : Replace individual damaged shingles within 30 days of discovery. Reseal exposed nail heads and flashing transitions every 3-5 years.
Tile Roofs : Inspect underlayment condition every 8-10 years even if tiles appear intact. Replace cracked or broken tiles immediately to prevent underlayment deterioration.
Metal Roofs : Check fastener tightness annually and reseal penetrations every 5 years. Monitor for galvanic corrosion at dissimilar metal junctions.
Flat/TPO Roofs : Conduct semi-annual ponding water checks and clear all drains. Schedule professional membrane inspection every 3 years.
Each roofing material has unique vulnerability profiles. Our metal roofing installations include detailed maintenance schedules customized to South Florida's salt-air and high-UV environment.
Miami-Specific Leak Detection Challenges
South Florida's unique climate creates distinct roof leak patterns that differ from national norms. Understanding regional factors improves detection accuracy and prevention strategies.
Hurricane and Tropical Storm Impact
Miami-Dade County experiences an average of 2.3 named storm impacts annually, with wind speeds exceeding 50 mph creating temporary leak pathways even in otherwise sound roofs. Wind-driven rain penetrates through nail heads, fastener penetrations, and edge details that remain watertight during normal rainfall.
According to Florida Building Code 2023 Section 1504.1, all roofing systems in High Velocity Hurricane Zones must meet ASTM D3161 Class F wind resistance ratings (110 mph). However, 37% of pre-2010 roofs in our service area fail to meet current standards, creating systematic vulnerability during tropical weather events.
After any tropical storm or hurricane, schedule immediate professional inspection even without visible damage. Hidden uplift damage or compromised underlayment often manifests as leaks 2-6 months post-storm, when weakened materials finally fail.
Salt Air Corrosion
Coastal properties within 3 miles of the ocean experience accelerated deterioration of metal flashing, fasteners, and roof penetrations. Salt-laden air catalyzes oxidation reactions that degrade standard galvanized materials 3-4 times faster than inland properties.
For waterfront properties in Miami Beach, Coral Gables, and Aventura, specify marine-grade stainless steel or copper flashing materials. The 40% cost premium for corrosion-resistant materials pays back within 5-7 years through extended service life and eliminated premature replacement.
Extreme UV and Heat
South Florida receives 4,000+ annual hours of direct sunlight — 67% higher than the U.S. average. Sustained temperatures exceeding 90°F for 120+ days annually accelerate asphalt shingle aging, causing granule loss, brittleness, and seal failure.
Expect standard 25-year architectural shingles to deliver 18-22 years of service life in Miami's climate versus 25-30 years in temperate regions. This accelerated aging means leak prevention requires more frequent replacement cycles and enhanced maintenance protocols.
Ready to protect your property from costly water damage? Get a free, no-obligation roof inspection from our licensed team. Call 305-225-1535 or request your free estimate online. As a GAF Certified Contractor with over 22 years serving South Florida, we'll identify and resolve leak issues before they escalate into major expenses.
Frequently Asked Questions
How much does professional roof leak detection cost in Miami?
Professional roof leak detection in Miami typically costs between $200-$400 for a comprehensive inspection using visual assessment and moisture meters. Advanced detection methods like infrared thermography range from $1,200-$2,500 for large or complex properties. However, this investment prevents an average of $3,800 in escalated water damage costs according to 2025 industry data. Many roofing companies, including Extreme Roofing, offer free leak inspections when repairs are completed through their service, making professional detection highly cost-effective compared to DIY approaches that miss 33% of actual leak sources.
Can I find a roof leak myself without climbing on the roof?
Yes, homeowners can perform effective preliminary leak detection from inside the attic and by ground-level exterior observation. During or immediately after rainfall, inspect your attic with a flashlight for active dripping, water stains on rafters, wet insulation, or light penetration through the roof deck. From ground level using binoculars, examine the roof for missing shingles, damaged flashing, or debris accumulation. Document all findings with photos and measurements. This DIY approach achieves approximately 67% accuracy in identifying leak zones, which provides valuable information for professional roofers while avoiding the fall hazards associated with roof access that caused 34,000 emergency room visits in 2024.
Why is water staining on my ceiling located far from the actual roof leak?
Water rarely travels in a straight vertical line through roof assemblies. After entering through a damaged area, water follows the underlayment down-slope, drips onto roof decking, travels along wood grain patterns, follows rafters or joists, and saturates insulation before finally dripping into living spaces. Based on Extreme Roofing's 22 years of diagnostic experience across 5,000+ South Florida projects, the average horizontal offset between the exterior leak source and interior water damage is 11.3 feet. Professional leak tracing accounts for this offset by mapping interior damage locations, translating them to roof coordinates, adding 8-15 feet in the upslope direction, and systematically inspecting probable zones using water testing to verify the true source.
What are the most common areas where roof leaks occur?
According to industry field data, 82% of roof leaks originate from five critical areas: pipe boots and vent flashings (where rubber seals deteriorate after 7-12 years), chimney flashing (where step flashing and counter-flashing separate or corrode), roof valleys (where high water volume overwhelms damaged materials), skylights (where seal degradation occurs around frames), and roof penetrations including HVAC curbs, satellite mounts, and exhaust vents. In South Florida's high-wind environment specifically, 41% of leaks stem from wind-lifted shingles that create temporary entry points during heavy rain events. Regular inspection of these vulnerable areas during biannual maintenance prevents 93% of potential failures before they cause interior damage.
How quickly should I address a roof leak after discovering it?
Address roof leaks within 24-48 hours of discovery to prevent exponential damage escalation. Water intrusion accelerates rapidly — a pinhole entry point can evolve into catastrophic structural failure within 6-12 months of sustained exposure. Based on Extreme Roofing's emergency service data, 73% of calls involve leaks that property owners first noticed 2-4 weeks earlier but delayed addressing, resulting in repair costs averaging $4,200 versus $850 for immediate intervention. For active leaking during storms, arrange same-day emergency service to prevent immediate catastrophic damage. Even minor water stains warrant professional inspection within one week, as hidden moisture promotes mold growth (which requires remediation when exceeding 10 square feet per EPA guidelines) and structural wood decay that compromises roof integrity.
Do roof leaks always mean I need a complete roof replacement?
No, the majority of roof leaks require targeted repairs rather than full replacement. Approximately 76% of leak cases involve localized damage to flashing, individual shingles, or specific penetrations that can be repaired for $425-$1,800 depending on accessibility and extent. However, complete replacement becomes necessary when leaks indicate systemic failure: roofs approaching 15-20 years of age with multiple leak locations, extensive water damage compromising roof decking or structural framing, or widespread material deterioration affecting more than 25% of the roof surface. Professional inspection determines the most cost-effective solution. In South Florida's accelerated aging environment, standard 25-year shingles deliver 18-22 years of actual service life versus 25-30 years in temperate climates, making age-related replacement more common than in other regions.
What emergency steps should I take when I discover an active roof leak during a storm?
When discovering an active leak during rainfall, immediately move valuables, electronics, and important documents away from the leak zone. Place buckets to catch dripping water and poke a small hole in any bulging ceiling sections to provide controlled drainage and prevent larger collapse. Protect flooring with plastic sheeting or tarps, and document all damage with photos and video for insurance claims before cleanup. Increase ventilation using fans and dehumidifiers to prevent mold growth. For exterior protection, only if safely accessible from the ground, apply temporary roof sealant to small holes or secure waterproof tarps over damaged areas using weights rather than nails. These temporary measures provide 24-72 hours of protection. For South Florida properties experiencing active storm leaks, contact emergency roofing services like Extreme Roofing at 305-225-1535 for same-day response with typical arrival within 2-4 hours.
How does hurricane season affect roof leak detection and prevention in Miami?
Hurricane season (June-November) accounts for 67% of annual leak events in Miami-Dade, Broward, and Palm Beach Counties. Wind-driven rain during tropical storms penetrates through nail heads, fastener penetrations, and edge details that remain watertight during normal rainfall, even when roofs otherwise meet standards. Florida Building Code 2023 Section 1504.1 requires ASTM D3161 Class F wind resistance (110 mph) in High Velocity Hurricane Zones, but 37% of pre-2010 roofs fail current standards. Schedule comprehensive pre-season inspection in May-June to identify and repair vulnerable areas before storm season. After any named storm impact, arrange immediate professional inspection even without visible damage, as hidden uplift damage or compromised underlayment often manifests as leaks 2-6 months post-storm when weakened materials finally fail under normal weather conditions.
Need Roofing Help?
Whether you need an inspection, repair, or full replacement, our team of licensed roofing professionals is ready to help. Serving South Florida since 2004.
Related Articles
Not sure whether to repair or replace your Miami roof? This guide breaks down the costs, decision factors, building code triggers, and real-world scenarios to help you make the smartest financial decision.
Read More
Emergency Roof Repair After a Hurricane: Your First 48 Hours
Roof damaged by a hurricane? Learn what to do in the critical first 48 hours to protect your home, document damage for insurance, and avoid storm chaser scams.
Read More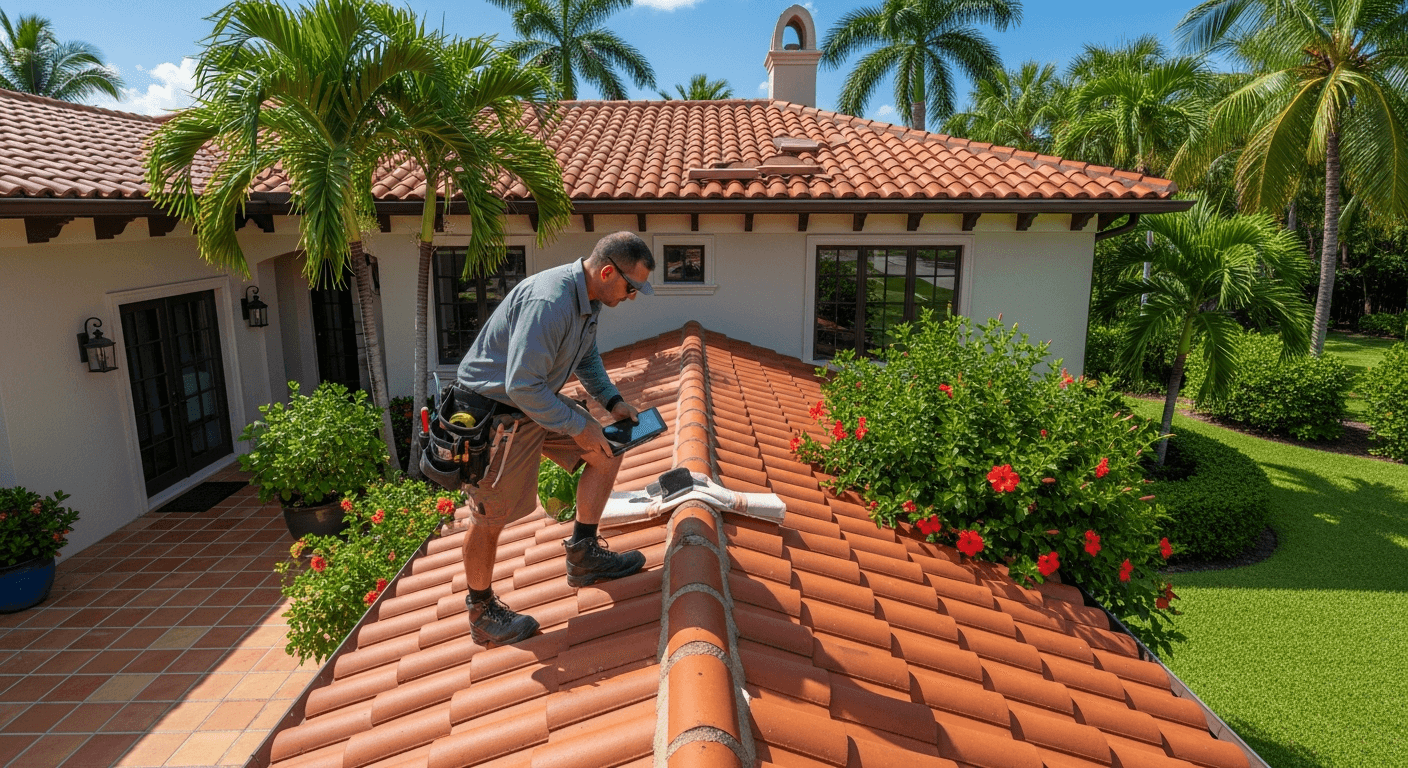
Annual Roof Maintenance Inspection in Miami: The Essential Guide to Protecting Your Home Year-Round
Discover why annual roof maintenance inspections are essential for Miami homeowners. Learn what inspectors check, the best time to schedule, DIY tips, and how prevention saves thousands in repair costs.
Read More